|
|
 |
France - country information |
 |
Veliky Novgorod - Russia |
 |
Riga - Latvia |
 |
Helsinki - Finland |
 |
Nha Trang: the weather has normalized, but the infrastructure has not been restored yet |
 LATEST REVIEWS
 |
Choosing a portable toilet |
 |
Plumbing faucets, the best of the best |
 |
Green crops |
 |
Dishwasher – freestanding, built-in or compact? |
 |
How to choose a dishwasher - what you need to know |
 Countries and cities
 Engineering plumbing/Useful articles and analytics
 Service single lever mixer tap - Cartridge Replacement
 Service single lever mixer tap - Cartridge Replacement
How to replace a cartridge in a one-handed bath or kitchen faucet with your own hands. Replacement instructions, useful tips for repairing a mixer (faucet) with a standard ceramic cartridge

Hello friends, if the mixer has stopped partially or completely blocking the water flow or after turning it off, water continues to drip from the faucet spout or leak from under the handle, then it's time to replace the cartridge.
In this video, we will talk about replacing the cartridge in a single-handle mixer.
The first thing to do is to shut off the cold and hot water supply to the mixer. Further, it is necessary to close the sink drain so that small objects do not fall there.
Now, in the mixer handle, from the hole for access to the locking screw, remove the decorative cap by prying it with a thin screwdriver.
The locking screw holding the handle on the cartridge rod can be either ordinary - for a flat slot, or for an internal hexagon, more often by 2.5 or 3 mm.

Having unscrewed the locking screw, you need to remove the mixer handle, the operation to remove the handle can be probably one of the most intricate moments in the whole epic of replacing the cartridge, since the handle material has one bad property to "sour" under the influence of moisture and stick tightly to the cartridge stem.
If you are still faced with this very moment, and you cannot remove the mixer handle, watch my other video on how to remove the handle.
So, if the handle is removed, we unscrew the protective screen located under it. Sometimes the screen can also stick, so we process the WD40 thread, wait for a while and unscrew it.
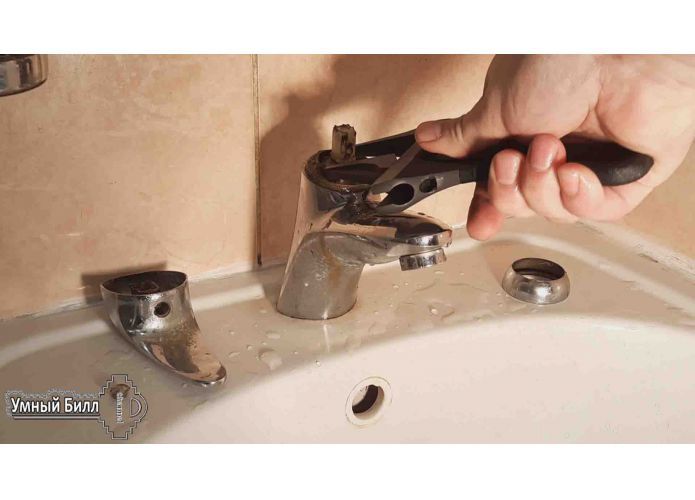
Having removed the protective screen, we get access to the clamping nut holding the mixer cartridge body, the diameter of the nut may differ, so it is best to have an adjustable wrench with which we unscrew the nut.
Having unscrewed the nut, we take out the worn-out cartridge, insert a new one in its place, making sure that the convex outflows in the lower part of the cartridge body coincide with the holes located in the mixer saddle. Having correctly positioned the cartridge, we press it with a pre-lubricated nut.

We tighten the nut carefully, it is only necessary that the rubber gaskets of the cartridge are tightly pressed against the mixer saddle, an excessively strong pressure is excluded, since the plastic body of the cartridge can be deformed.

Next, we screw the protective screen into place. Now is the time to install the mixer handle.
In order to subsequently be able to freely remove the handle, we process the seat of the handle with thick grease, put the handle on the stem and tighten the fixing screw, install the plastic screw cap in place.
I would also like to add, if you are repairing the mixer, check its aerator, remove it and clean it, and if there is a strong deposit of deposits, it is better to replace it with a new one, since a faulty mixer aerator can present unexpected and rather unpleasant surprises that you can learn about in one from my videos.
And that's all, let me wish you only serviceable plumbing, do not forget to subscribe to my channel, good luck to everyone and see you soon.
Watch a detailed video on replacing a cartridge in a mixer with one handle per channel CleverBillDIY


|
 |
| © tour-planet.com 2017 - 2025 |
Copying of texts, photos and other information for re-publication on other resources is allowed only with the written permission of the site administration. |