|
|
 |
France - country information |
 |
Veliky Novgorod - Russia |
 |
Riga - Latvia |
 |
Helsinki - Finland |
 |
Nha Trang: the weather has normalized, but the infrastructure has not been restored yet |
 LATEST REVIEWS
 |
Choosing a portable toilet |
 |
Plumbing faucets, the best of the best |
 |
Green crops |
 |
Dishwasher – freestanding, built-in or compact? |
 |
How to choose a dishwasher - what you need to know |
 Countries and cities
 Do it yourself - DIY/Useful articles and analytics
 Drywall - Mounting (gluing) on glue or another way to align the walls
 Drywall - Mounting (gluing) on glue or another way to align the walls
The technology of gluing drywall to walls using mounting adhesive ...

Sometimes, when it is necessary to level the walls, but at the same time, the installation of drywall sheets on the supporting frame or leveling with plaster, for some reason, is not suitable, you can level the wall with drywall and special glue.
Sometimes there are unflattering comments about this technology, for those who believe that this method is a hack, I can say this, high-quality alignment of walls with glued drywall is not at all synonymous with the word hack, since this method has both its pluses and minuses in comparison with plaster, or with the same plasterboard wall alignment along the supporting metal frame.
And everything can be turned into hack-work, that plaster or drywall due to non-compliance with technology or the curvature of the hands.
I would like to note that gluing drywall to mounting adhesive is the current Knauf technology .
Let's figure it out, and first consider the pros and cons of this technology compared to other methods, and then you can watch a short video showing the option of mounting drywall sheets on mounting adhesive.
Pros in gluing drywall to the wall
- Installation of sheets on glue is faster than with the option with a supporting frame or plaster.
- This option is cheaper than mounting sheets on a frame or plaster, in a situation where it is necessary to apply a thick layer and, compared to plaster, has less weight.
- To position the sheets in the desired plane, beacons are not needed, it is enough to install dowels in the wall with self-tapping screws screwed into them and set in one plane according to the laser level (for a small room it takes very little time, you can see the process a little later).
- This method allows you to place the drywall sheet as close to the wall as possible, compared to mounting on a supporting frame, which would require a greater indentation from the wall.
- A glued drywall sheet has a much smaller drumming effect and does not "ring" compared to mounting sheets on a frame.
Minuses
- Of the minuses of this method, it can be noted that there are cavities behind the drywall sheet, although what is there to talk about, because when installing sheets on a supporting frame, in general, the entire wall turns out to be hollow.
- Also, with this method, it is impossible to install insulation or sound insulation between the wall and the sheet.
- Many do not recommend, and I probably agree with them that this method is highly undesirable in a situation of internal installation on external walls due to the possible formation of dampness and mold under the drywall.
The option with gluing drywall is suitable for small differences on the wall, therefore, it should be borne in mind that the maximum thickness of the adhesive, for example, the same Perlfix, is limited to 2 cm.

If the layer thickness is higher, then the same Knauf recommends pre-gluing additional drywall strips at the places where the glue is applied in order not to increase the thickness of the adhesive layer.
Therefore, before choosing an alignment method, everyone should clearly understand which method is the most optimal and cost-effective in this case.
Well, now a short video about the very method of fixing drywall sheets to walls using mounting glue.
The first thing to do is to check the wall for slopes, depressions and holes and find the zero point. What is a laser level used for?
Having understood what the wall is and what the thickness of the adhesive layer will be, I mark places on the wall for dowels.
For each sheet that is installed vertically, I mark rows of two or three holes located in one horizontal line, the next row of two or three holes is placed with a vertical offset of 50 - 60 cm.
Having drilled holes, I install dowels and carefully prime the walls. After the soil is dry, I install the laser level as close as possible to the wall and start to screw in all the screws to the mark located on the bit of the screwdriver, which means the zero point.

Thus, having screwed all the screws to a certain depth with the help of a level, I get a kind of beacons for drywall that determine the correct plane of the wall.
Next, I prepare sheets of drywall, if necessary, I cut the sheets in height, the sheet should freely stand against the wall on two drywall linings, holes for sockets are also cut.
After that, the glue is kneaded, in this situation I used Perlfix glue, I’ll say right away that this is not advertising, since there is a special assembly glue, then why reinvent the wheel.
On the net, I often see what they just don’t glue sheets of drywall on, someone glues it on tile glue or even Rotband, here everyone must decide for himself what is more important to him, quiet work or an experiment with an unknown result.
It is worth remembering that for the same perlfix, the lifetime is limited to only 30 minutes, this glue should be diluted only in a clean container, otherwise the glue can get up much faster.
I recommend kneading a small portion for the first time, look at the “life” of the solution, it happens that bags previously stored incorrectly, for example in high humidity, can present an unpleasant surprise in which the glue rises after kneading after a short time right in the container.
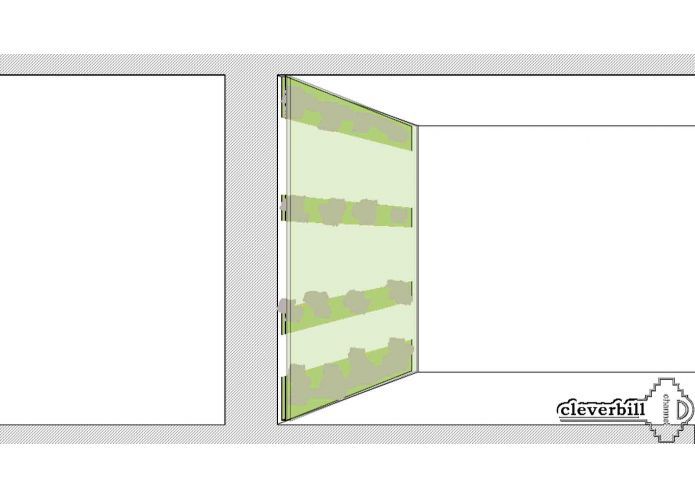
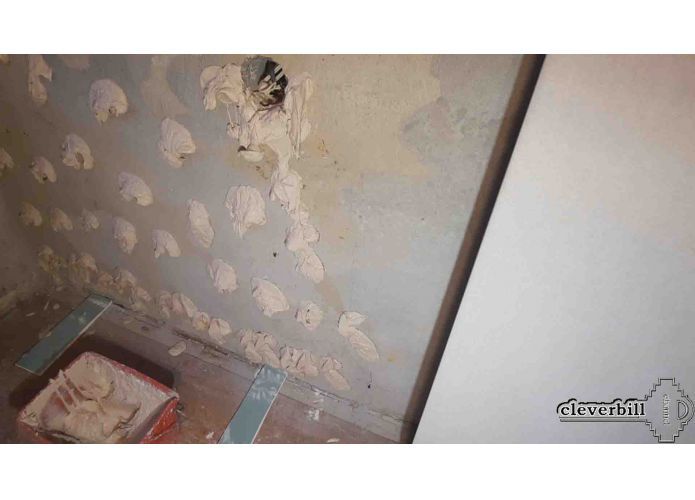
I stir a portion of the glue so that it would be enough for gluing one sheet of drywall, I apply glue to the wall in the form of separate convex strokes.
At the bottom, I apply glue in a continuous strip. If you follow the recommendations of Knauf, then the glue should be applied not to the wall, but to the sheet, applying it along the sheet in a continuous layer, and in the center with an interval of 35 cm.

This option is good if the walls are even and the adhesive is applied with a minimum thickness, but what if the wall is uneven? And somewhere you need more glue, and somewhere less?

Realizing that when applying glue to a sheet, the sheet becomes heavy, and it can be very difficult to lift it alone and not break it, scoring the recommendations, I apply glue to the wall, and navigate by the protruding screws, so I can immediately see where the glue is needed apply more and where less.
After applying glue to the wall and placing the lining on the floor, I install the sheet, pressing it against the wall. For better fixation, I tap and press it until the screws protruding from the wall, after which I check the plane using the rule.
Next, I glue the vertical gap between the wall and the sheet with glue.
Thus, all subsequent sheets are glued, the necessary time is given for the glue to dry, after which, some additionally fix the sheets to the wall using dowel nails.
For these purposes, I use roofing washers for ondulin.
With a 25 mm pen drill I make a small selection in drywall, literally just a little bit to hide the washer, then with a 12 mm pen I expand the hole so that the inverted washer freely enters the sheet, after which I drill a hole for the dowel with a puncher.
It remains to insert the dowel into the wall and tighten the self-tapping screw by pressing it with a plastic washer placed on the reverse side, the main thing here is not to tighten it too much so as not to break the drywall, for which I use a torque limiter in a screwdriver.
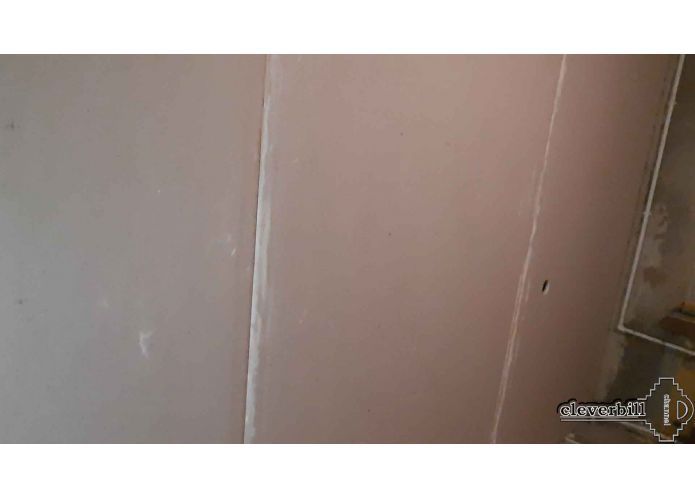
Further, the upper gap between the sheet and the ceiling is closed, as well as the joints between the sheets are closed. In the future, the sheets are finished corresponding to the finish coating.
Definitely, this method has the right to life, the glued sheets are held quite securely, of course, provided that they are glued to a strong and dust-free base.
Watch a detailed video about installing drywall with glue on the Clever bill DIY channel


|
 |
| © tour-planet.com 2017 - 2025 |
Copying of texts, photos and other information for re-publication on other resources is allowed only with the written permission of the site administration. |